3 1/2 Steps For Fixing A Fatal Podcasting Error
The other night I was driving home listening to a new podcast. The host had a smooth, honest delivery and an engaging way of describing the predicament that had befallen him. I was planning to tweet about his show until the host segued to an interview and I lost him.
I don’t mean he confused me. I mean I lost him. Literally.
For whatever reason, the podcast audio dropped so low I could no longer hear it. I knew the volume on my iPhone was already set to maximum. I was in stop-and-go traffic (it’s Los Angeles—there’s stop-and-go traffic in your driveway) so there was no chance I was going to wake up my iPhone and fool around with my podcast app. You know the saying about how people will put up with anything to listen to great content? It’s a myth. If people can’t hear the great content they won’t listen to it.
At the next red light I stopped the podcast and switched on the radio. I didn’t just leave the podcast, I left the podcasting ecosphere. Call me old fashioned, but I believe podcasts should attract listeners to the medium not drive them away.
15 Minutes That Would Have Avoided This Fatal Error
I decided to see what it would take to make this podcast not only audible but listenable. Start to finish it took about 15 minutes. Those 15 unspent minutes would have earned this podcast a recommendation on Twitter and probably some new listeners. I hope you never find yourself facing a podcast with widely-varying audio levels but, if you do, the following steps will help you produce an episode that shows off your great content.
Keep Your Eye on Your Audio
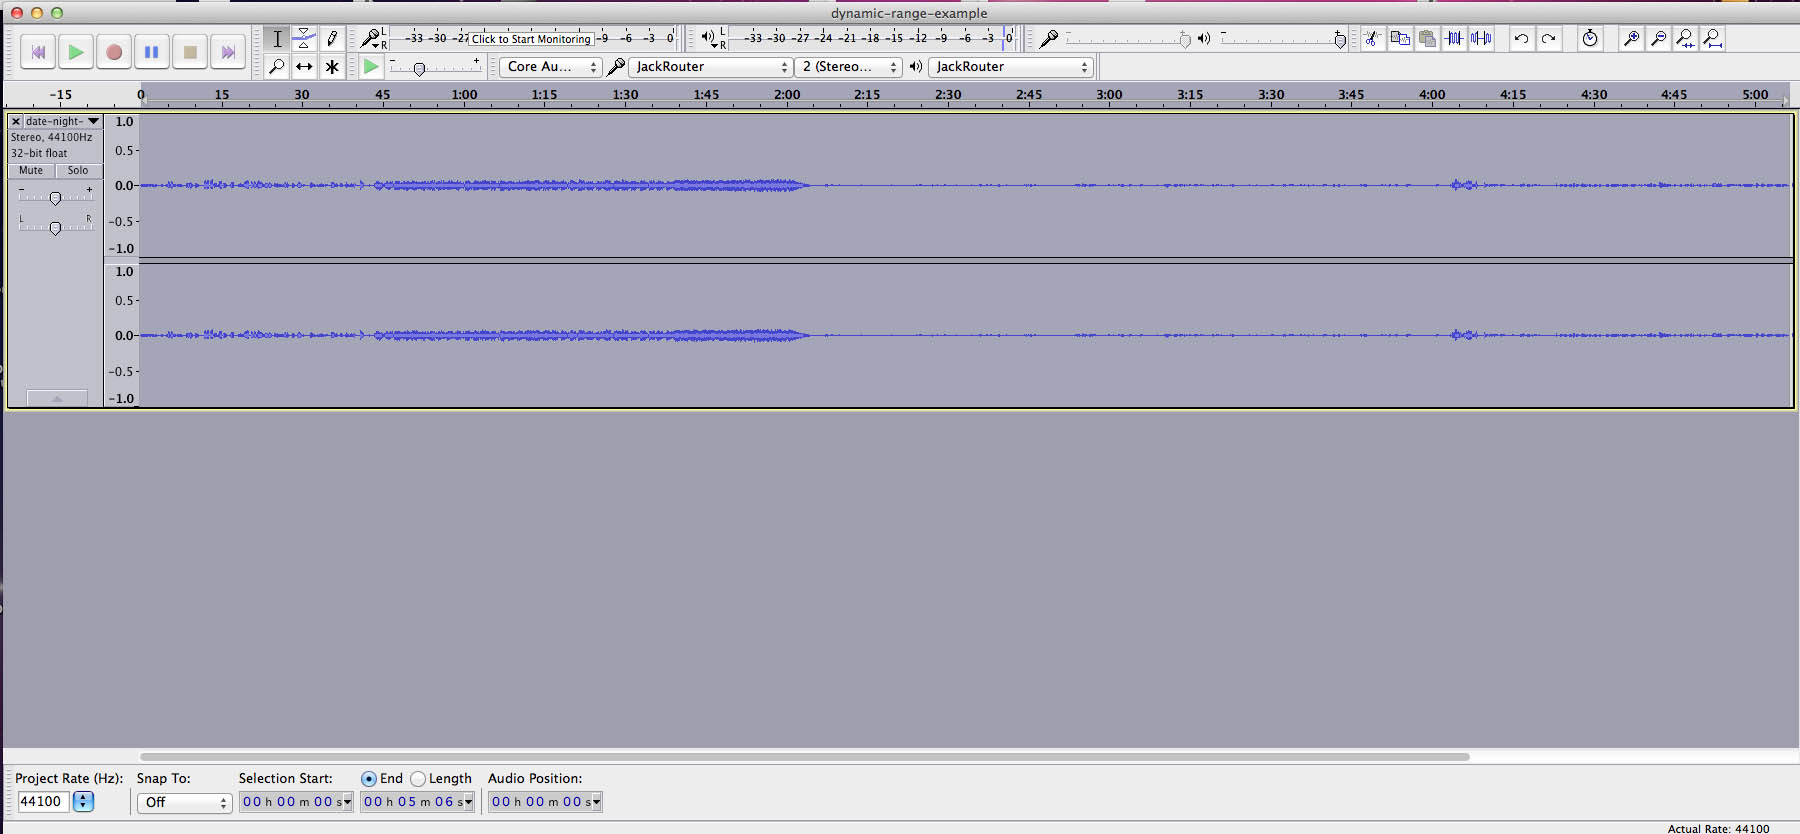
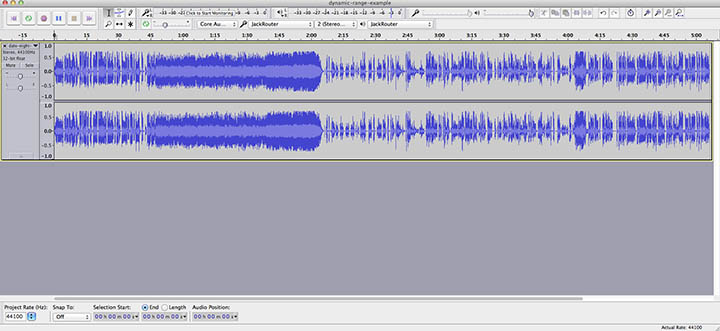
Take a look and the screenshot above. It’s a selection from the original podcast audio as viewed in Audacity. Not only can you see that the difference between the loudest and softest sounds—what audio engineers call the dynamic range—is uncomfortably large, the audio that’s roughly in the middle of the screen is almost a flat line. For practical purposes, it’s inaudible. I recommend you take a minute or two to eyeball your podcast like this so you can spot problems such as inaudible passages, loud spikes, dropouts and noise.
Three and 1/2 Steps to Listenability
Here’s what the same audio looked like after some tweaking, and here are the tweaks I used to do it. (I’m assuming you have a basic knowledge of Audacity—or some equivalent digital audio editor/workstation. If you have a question about what follows leave a comment and I’ll do my best to help you.)
Step 1: I normalized the audio to -3.0db. That made everything audible. I noticed that the audio to the right of that loud passage (which is music used as a separator between the show intro and the interview) was still too low, so I selected everything to the right of the music and applied the normalization effect again.
Step 2: The dynamic range was still too high for my taste so I compressed the audio. Getting the right settings for compression is an art more than a science. I try to use the least compression I can because the process can introduce distortion and other unwanted side effects. In the end, I used a threshold of -24db and a compression ration of 5:1. What this means is that audio below -24db got a considerable boost, but audio over -24db was barely touched. After compressing the audio, the compressor effect boosted the whole podcast so that it peaked at 0db.
Step 3: I don’t like to distribute my audio at 0db because I’ve found it distorts on many devices. And, I still wanted to knock the dynamic range down some more. I selected the hard limiter effect set to -3.0db. When you set the hard limiter to some value you can be sure that’s the loudest your audio will get. Think of it as a brick wall for audio.
I don’t remember if the hard limiter came with Audacity. I seem to recall adding it as a plugin. If you don’t have it listed in your effects menu, poke around on the Internet. Search for “VST hard limiter plugin” (sans quotes) or variations on that theme.
If I’d stopped there I would have had an acceptable podcast. There’s a little added distortion from all the processing but it didn’t make the program unlistenable. And, I could hear the entire program now, without fiddling with my phone’s volume buttons. That was my goal.
In this case, however, my boosting the very low audio to the right of the music introduced some background hiss. I felt guilty about that so I decided to get rid of it. You might not have the same guilt genes so feel free to omit the noise removal. (That’s why I consider this next operation half a step.)
Step 3 1/2: Audacity has a great two-step noise removal effect. I isolated the hiss I wanted to remove and set it as the noise pattern. Then, I reselected the noise removal effect and clicked on noise removal. Since I managed to find a short piece of hiss that was in the clear, with no traces of the host or guest’s voices, the cleanup was amazing. The hiss was gone with only a slight degradation in voice quality.
I’ll be the first to admit my results aren’t perfect. There’s more distortion than I would prefer in my podcasts. I could spend some time cleaning up the distortion, too, but I stopped short of that because I wanted to focus on the essential steps that can save a podcast with a large dynamic range.
Let me know if you found this post helpful. And, please take a moment to share your favorite techniques for making your podcasts sound great.